
Contract development and testing
development contract
In the previous article we created a base contract for ERC721 with Mint functionality, so let's move on to writing and compiling the contract.
In the following code we simply implement a new mint method to replace the safeMint generated by default. The new mint method maintains the same interface as the method we used in the previous chapter so that we can replace the course's contract with the new one once we have deployed the contract.
Specifically to be modified within there:
- set
initialOwnerto be the contract issuer so that it is simpler to deploy the contract without having to specifyinitialOwner. - define a contract private variable
privatenamed_nextTokenIdof typeuint256to mark the current progress, and add one to the value for each new NFT. 1. setmintas the contract issuer so that it will be easier to deploy contracts without specifyinginitialOwner; quantityof typeuint256is required to be passed inmintmethod to represent how many NFTs are to be minted this time, here we simplify the logic by limiting the minting to one at a time.- remove the
onlyOwnermodifier so that anyone can call themintmethod. 2. add thepayablemodifier so that anyone can call themintmethod. - add the
payablequalifier so that anyone calling themintmethod can transfer money to the contract at the same time. _safeMintshould also be changed to_mint, mainly to avoid errors when testing the contract by calling it from a Remix contract later on, andtoshould be changed tomsg.sender, which stands for the address that the NFT is casting to for initiating the transaction.
The code is as follows:
// SPDX-License-Identifier: MITpragma solidity ^0.8.20;import "@openzeppelin/contracts/token/ERC721/ERC721.sol";import "@openzeppelin/contracts/access/Ownable.sol";contract MyToken is ERC721, Ownable {+ uint256 private _nextTokenId = 0;- constructor(address initialOwner)+ constructor()ERC721("MyToken", "MTK")- Ownable(initialOwner)+ Ownable(msg.sender){}- function safeMint(address to, uint256 tokenId) public onlyOwner {+ function mint(uint256 quantity) public payable {+ require(quantity == 1, "quantity must be 1");+ require(msg.value == 0.01 ether, "must pay 0.01 ether");+ uint256 tokenId = _nextTokenId++;- _safeMint(to, tokenId);+ _mint(msg.sender, tokenId);}}
Privaterefers to methods and variables that can only be called in the pre-deployment contract, whilepublicmethods and variables are accessible to everyone.
test contract
- Unit Test Plugin
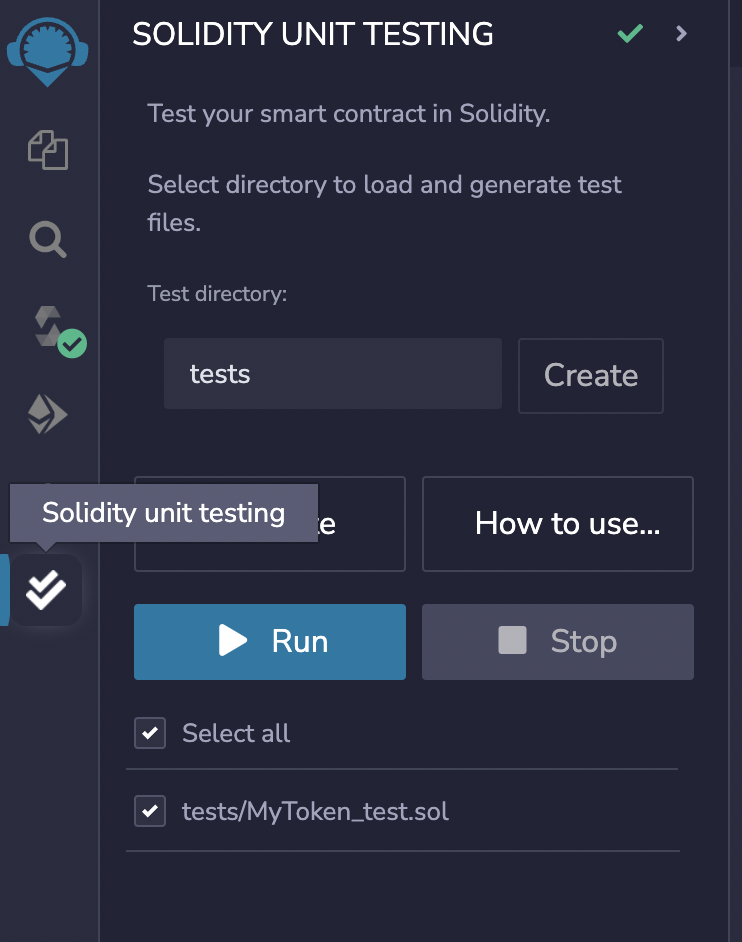
We need to click on the Plugin Manager icon in the bottom left corner of the plugin manager to search for the unit keyword, then the search result SOLIDITY UNIT TESTING will appear, click on Activate to install and activate the plugin, as shown in the figure below:

The Solidity unit testing icon will then appear in the left icon bar and clicking on it will load the plugin in the side panel.
After successful loading, the plugin should look like this:
- Unit test documentation
Remix injects a built-in assert library that can be used for testing. You can see the documentation of the library here.
In addition to this, Remix allows some special functions to be used in the test file to make the tests more structured. They are:
beforeEach()- Run before each testbeforeAll()- Run before all testsafterEach()- Run after each testafterAll()- Run after all the tests
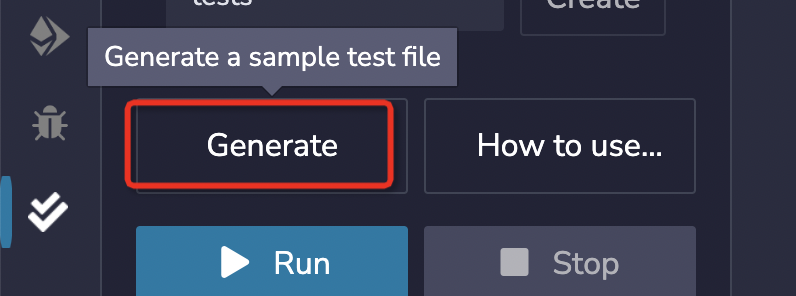
Our unit test file, in the directory tests/MyToken_test.sol, is there because the template contract we chose automatically created the test contract for us. If we had created a new blank folder, then we would need to click through the Generate button to generate the test file, as shown below:
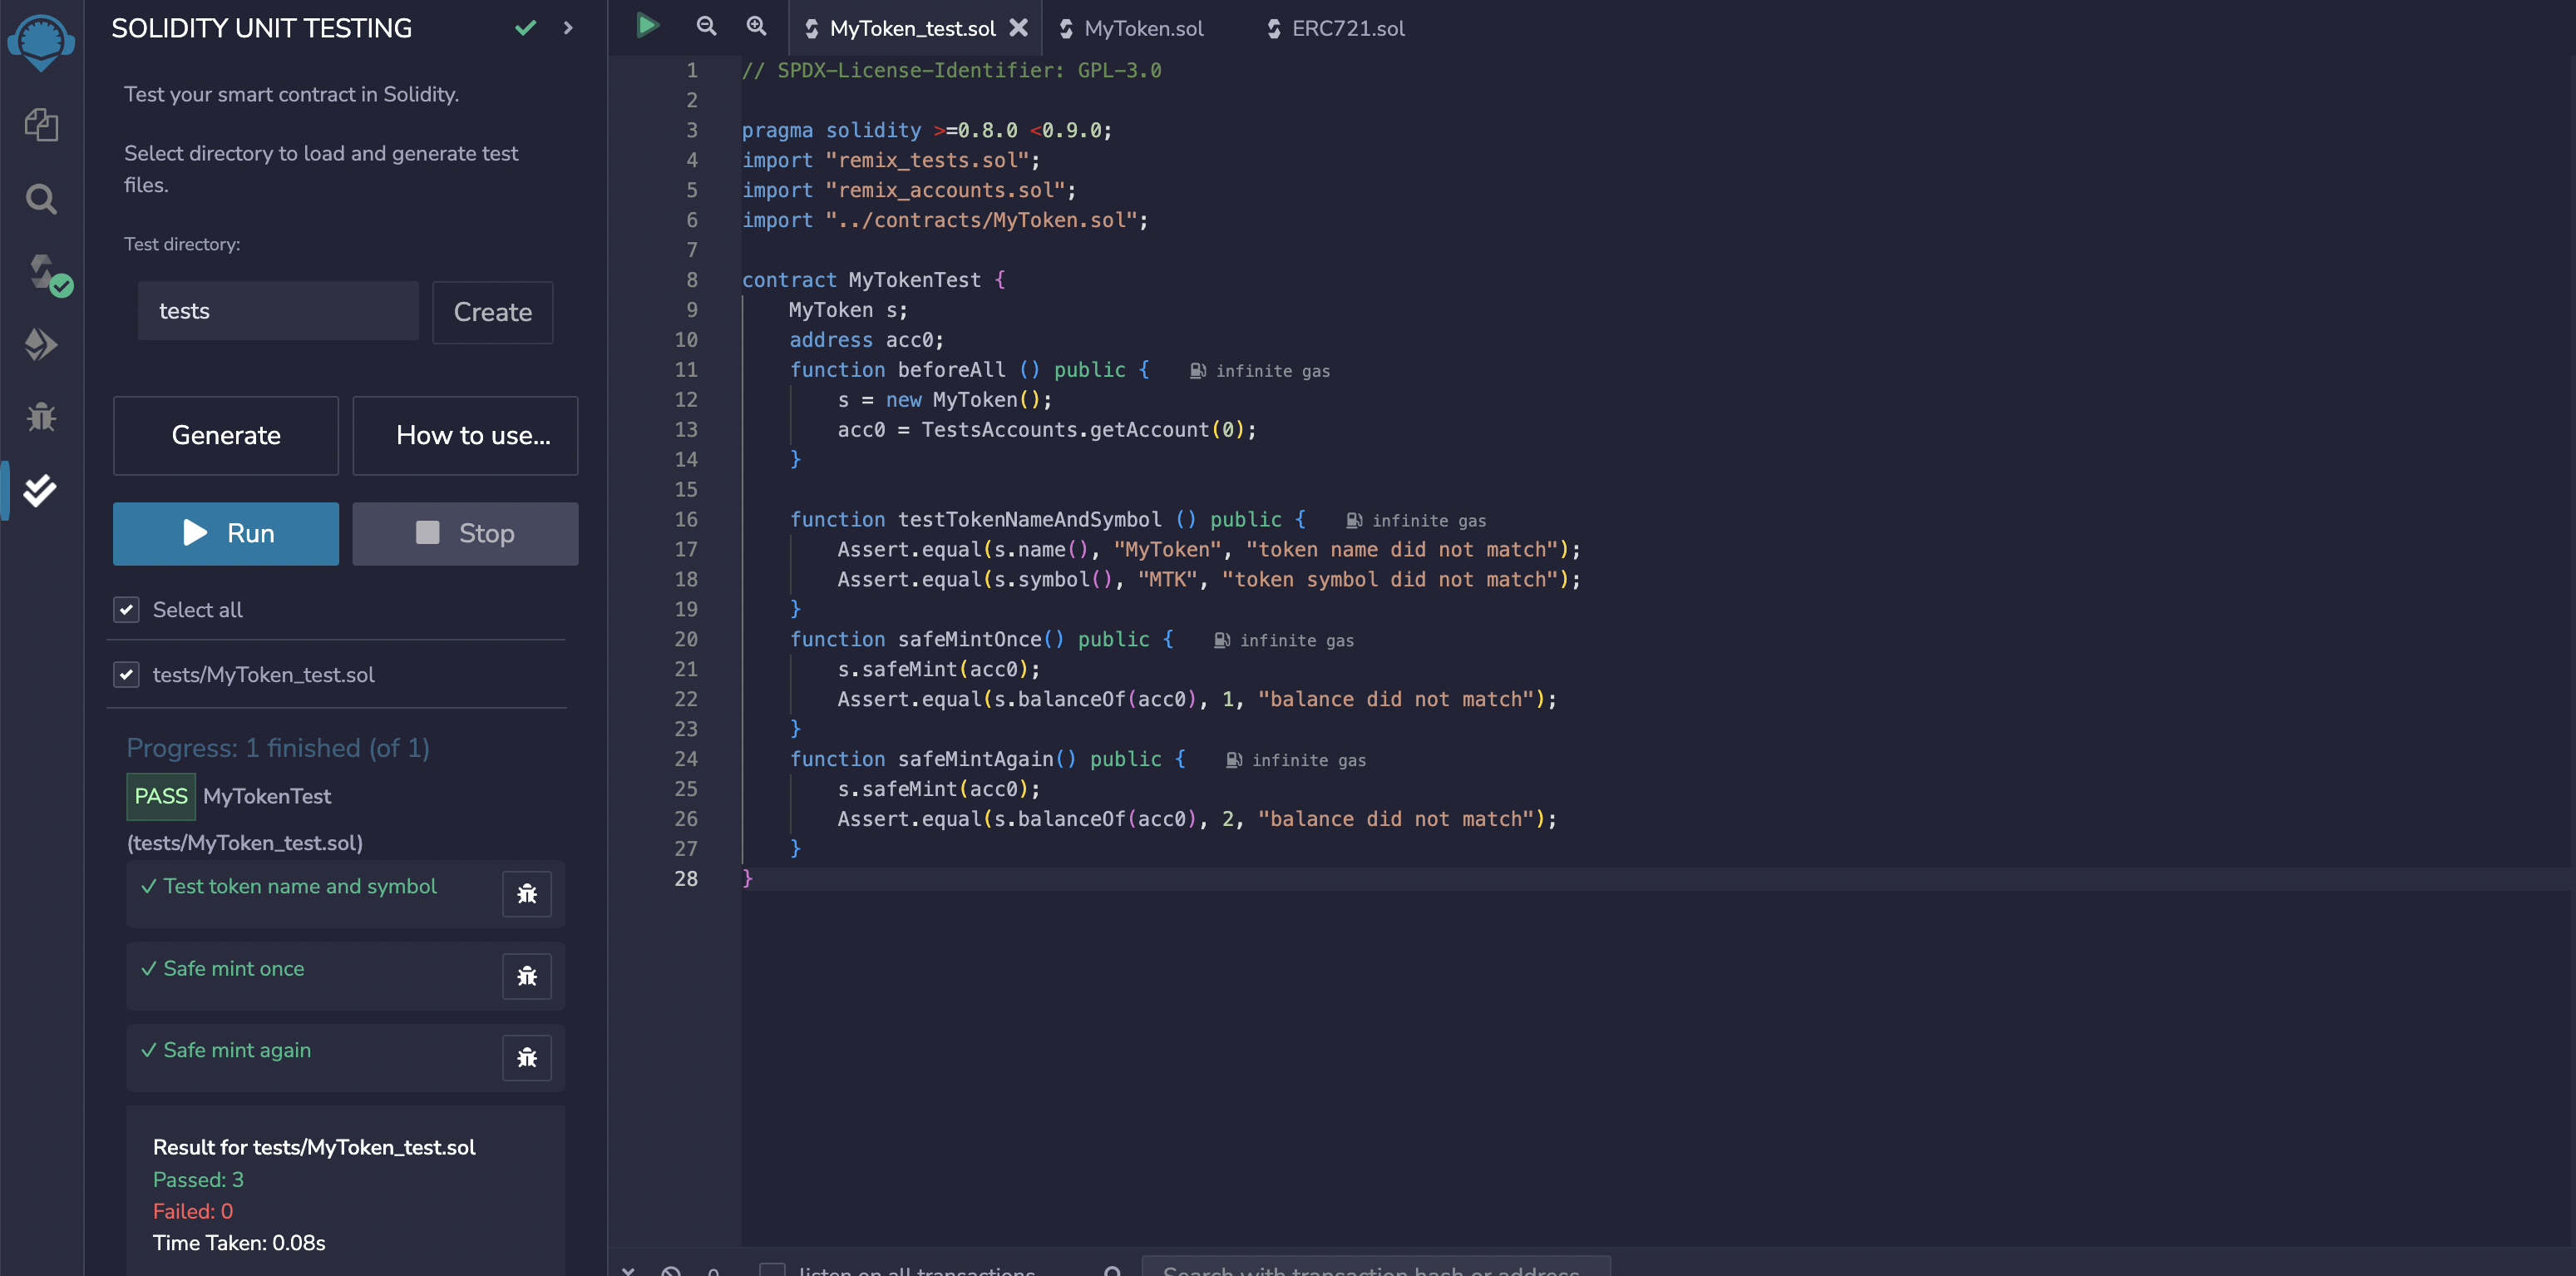
Then we click on our test file tests/MyToken_test.sol in File explorer and write the following test:
remix_tests.solis automatically injected byRemix;remix_accounts.solgenerates the list of test account addresses for us;../contracts/MyToken.solintroduces the contract file we have written;- instantiated our contract
MyTokendefined assinbeforeAll()and took a test address and saved itTestsAccounts.getAccount(0)defined asacc0; - verify in
testTokenNameAndSymbol()that the instantiated contractname()is going to get the valueMyTokenandsymbol()the value ofMTK; - Write a function
testMint()that calls ourmint(1)method, and the value ofbalanceOf()cast once should be1. The code for thetests/MyToken_test.solis as follows:
// SPDX-License-Identifier: GPL-3.0pragma solidity >=0.8.0 <0.9.0;import "remix_tests.sol";import "remix_accounts.sol";import "../contracts/MyToken.sol";contract MyTokenTest {MyToken s;function beforeAll () public {s = new MyToken();}function testTokenNameAndSymbol () public {Assert.equal(s.name(), "MyToken", "token name did not match");Assert.equal(s.symbol(), "MTK", "token symbol did not match");}/// #value: 10000000000000000function testMint() public payable {s.mint{value: msg.value}(1);Assert.equal(s.balanceOf(address(this)), 1, "balance did not match");}}
Remix's single test is to call the contract we want to test in a contract to test, the details will not be expanded first, you can refer to Remix unit test plugin's documentation.
- Running Unit Tests
When we have finished writing the test, select the file and click Run to execute the test. The execution will run in a separate environment. After completing the execution of a file, the following test summary will be displayed:
And that's it, unit testing for our contract is done.
Of course, if you're more comfortable testing with Chai and Mocha, Remix is also supported.
Chai is a BDD / TDD assertion library for Node.js and browsers that pairs happily with any JavaScript testing framework.Mocha is a feature-rich JavaScript testing framework that runs on Node.js and browsers, making asynchronous testing easy and fun.
Simply create a js file in your workspace, preferably in the scripts folder. Then right click on the new js file with the test code written in it and click Run.
It will look something like this:
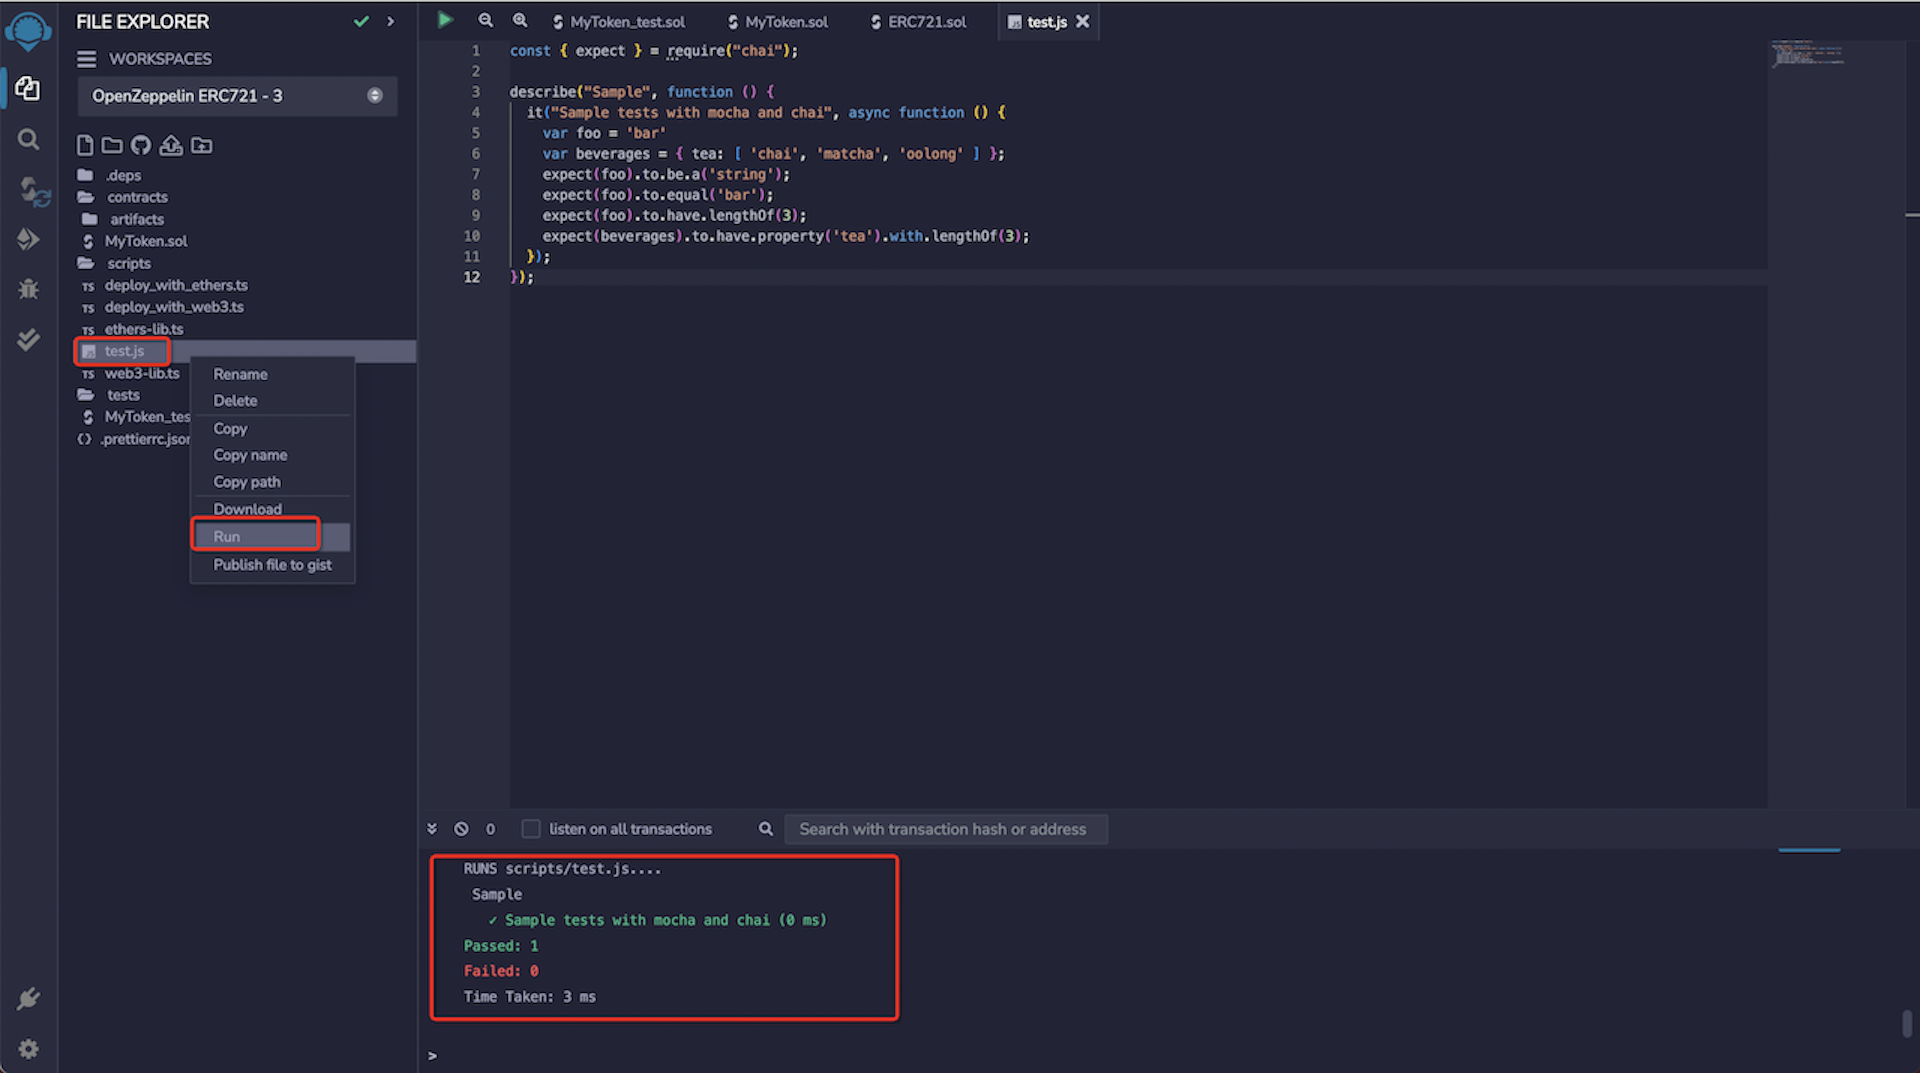
Click Run and the results will be displayed in the terminal after executing the test.
Here is just an example, providing ways and means by which this can be done, and is fully supported if you are good at this approach.
Next we'll try, Compile and Deploy Upstream the contract file we wrote.