
Compile and Deploy Contract
Compile
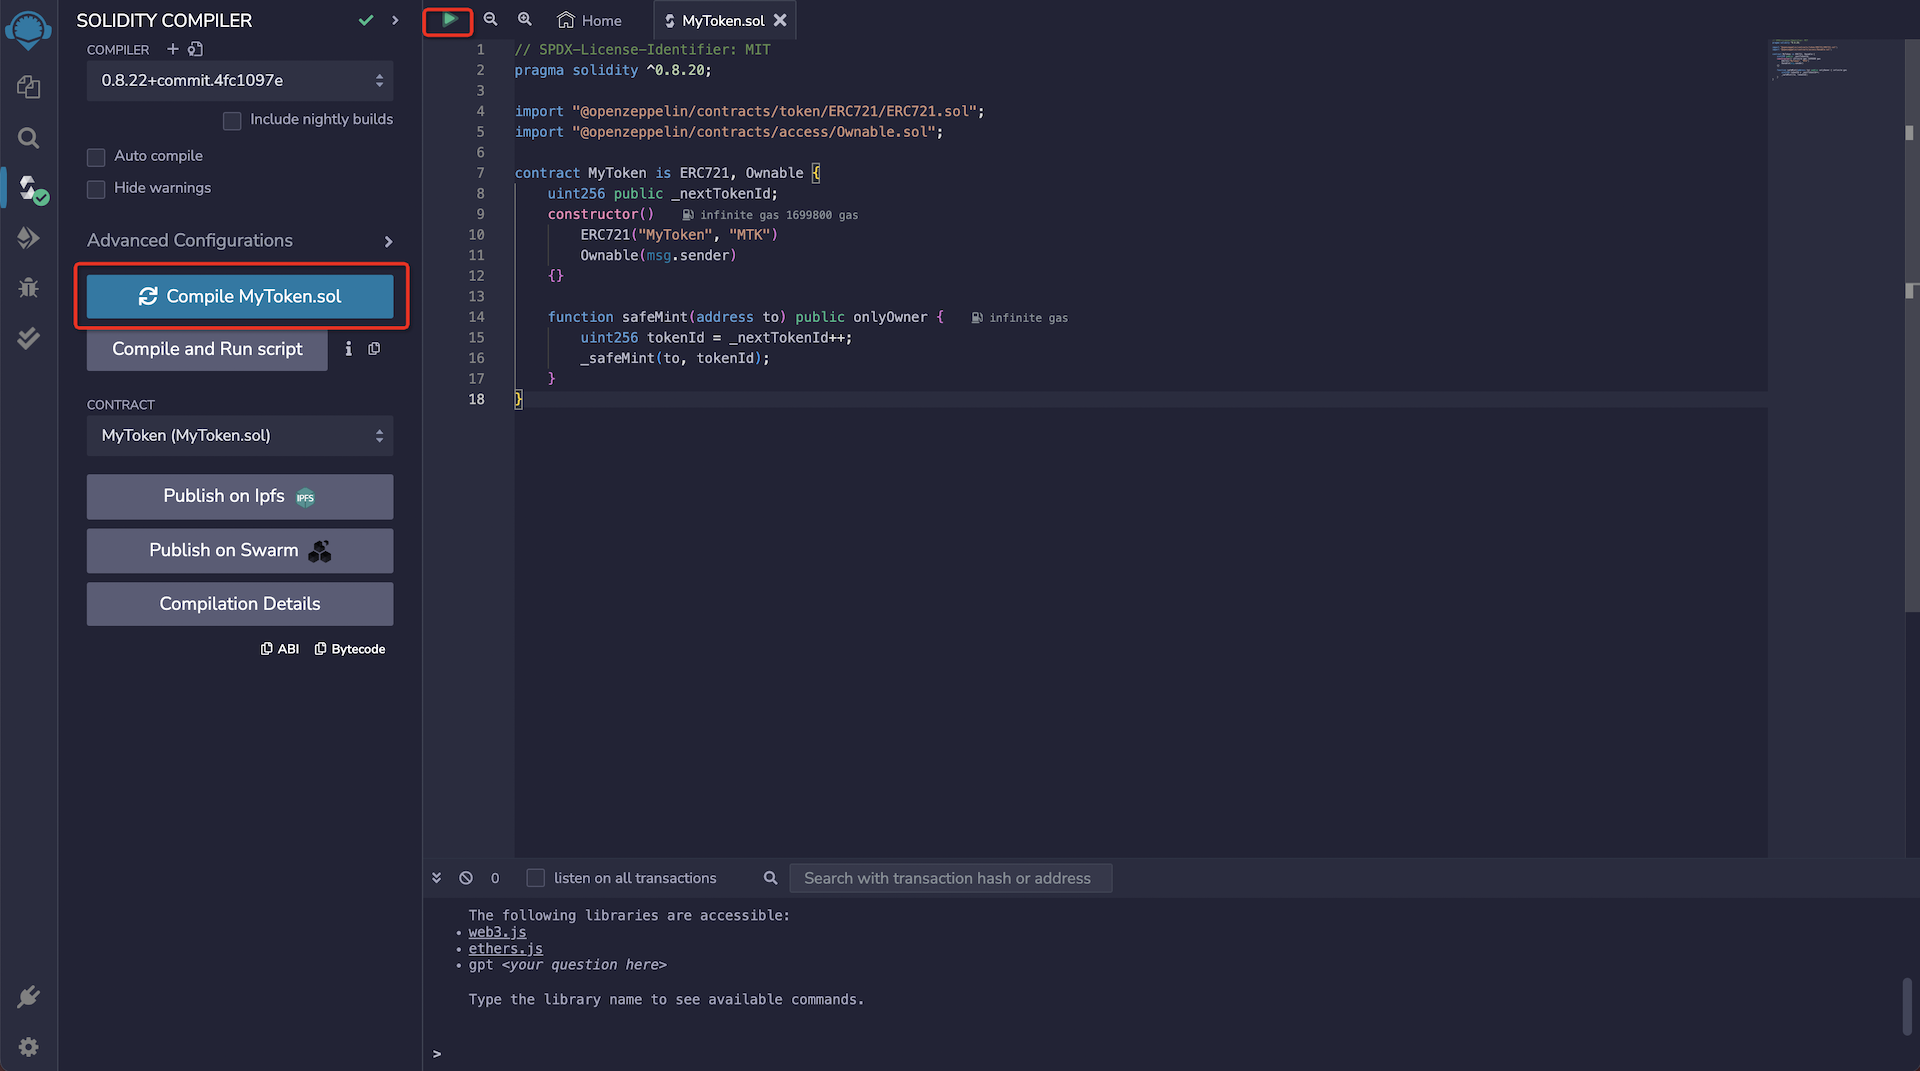
Click the Solidity Compiler icon in the icon panel to enter the compiler interface. The interface displays the basic configuration items of the compiler by default. Click the Advanced Configurations button to open the advanced configuration panel. In the Advanced Configurations menu, you can change the EVM version, enable the optimization function, and set the number of times the bytecode is expected to run during the contract lifecycle (default setting is 200 times). For more information about contract optimization, see Solidity documentation on Optimizer.
Open a file in the File explorer to compile. If multiple files are opened, make sure that the file you want to compile is selected in the editor.
There are three cases that trigger compilation:
- Use the shortcut key
control/command + s - Right-click the file in the
File explorerand select the compilation option - Click the
Compilebutton
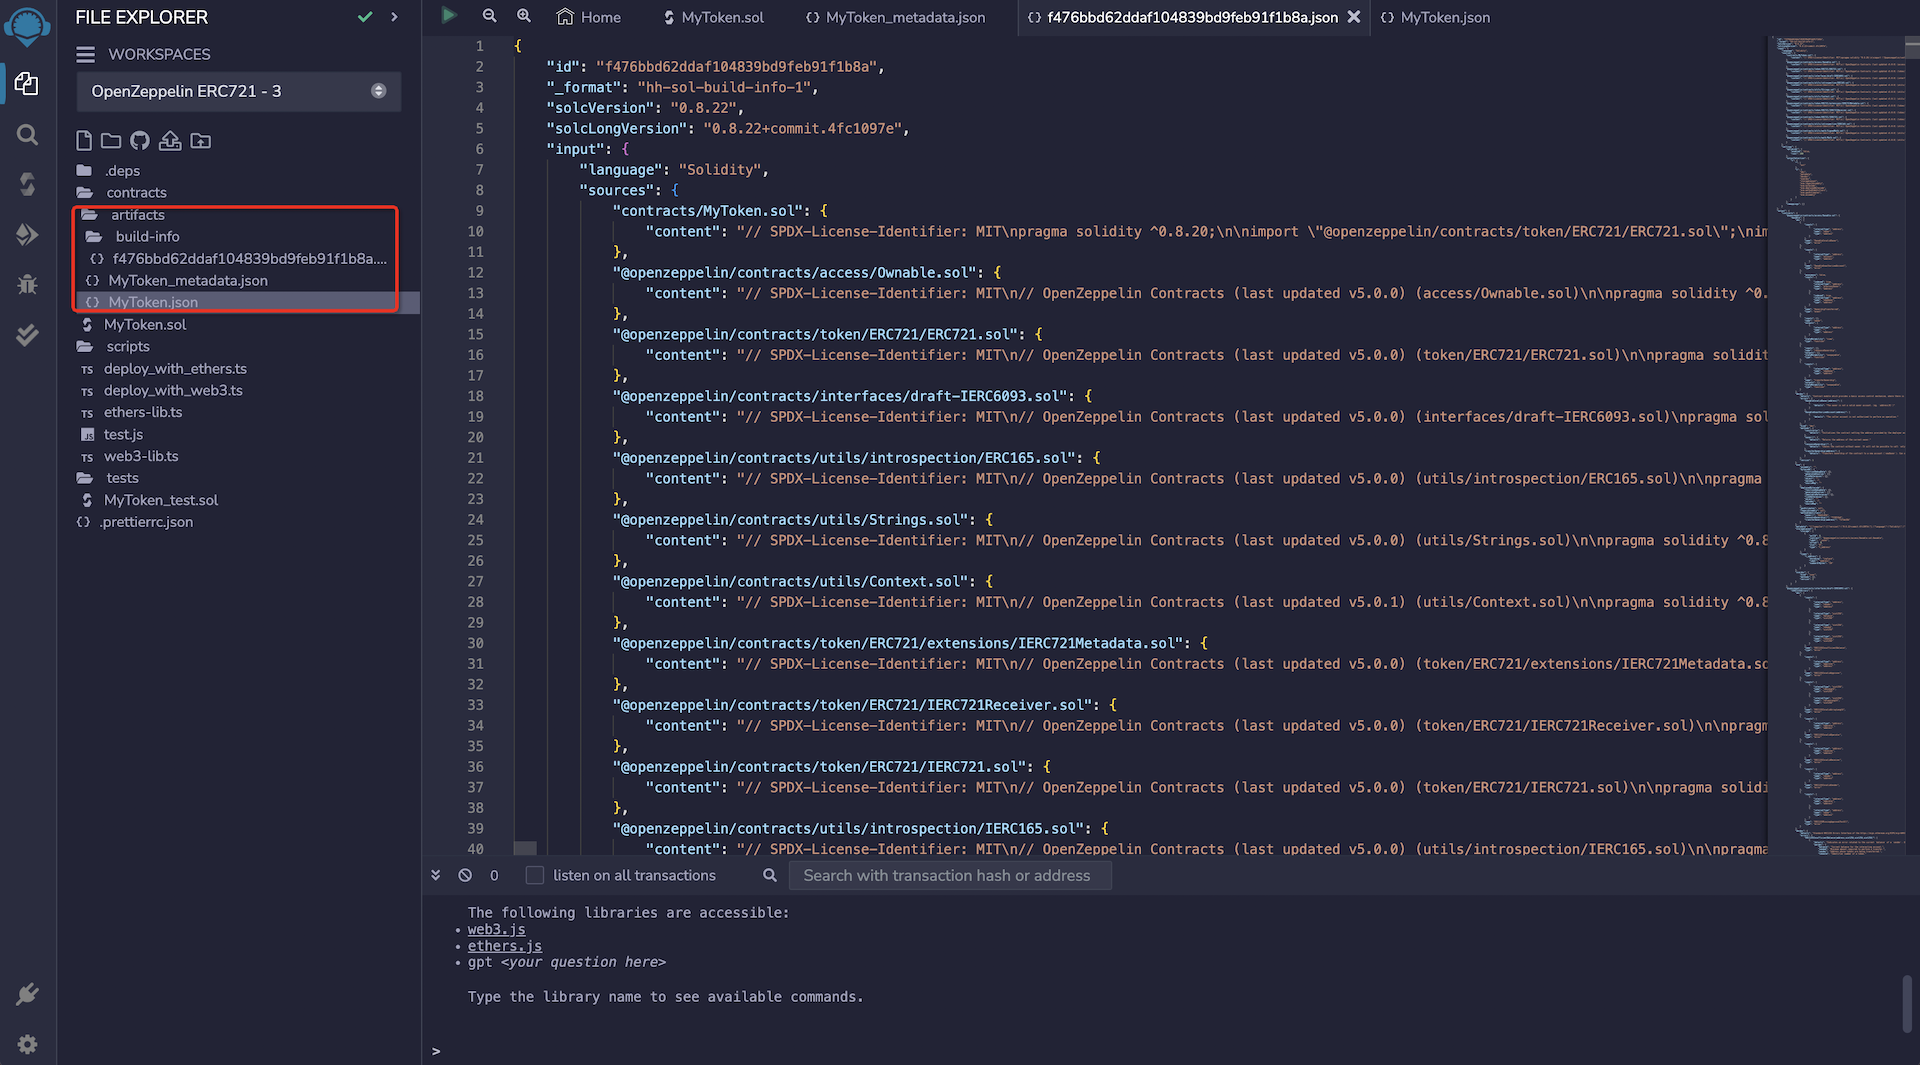
When the compilation is completed, there will be a green completion mark next to the Solidity Compiler icon, just like the one in the picture above. And Remix will create three JSON files for each compiled contract. These files can be seen in the File explorer plugin:
artifacts/<contractName>.json: Contains the link oflibraries,bytecode,deployedBytecode,gas estimation,identifiersandABI. It is used to associate the library address with the file.artifacts/<contractName_metadata>.json: Contains the metadata output bySoliditycompilation.artifacts/build-info/<dynamic_hash>.json: Contains information aboutsolccompiler version, compiler input and output.
Just like the picture below:
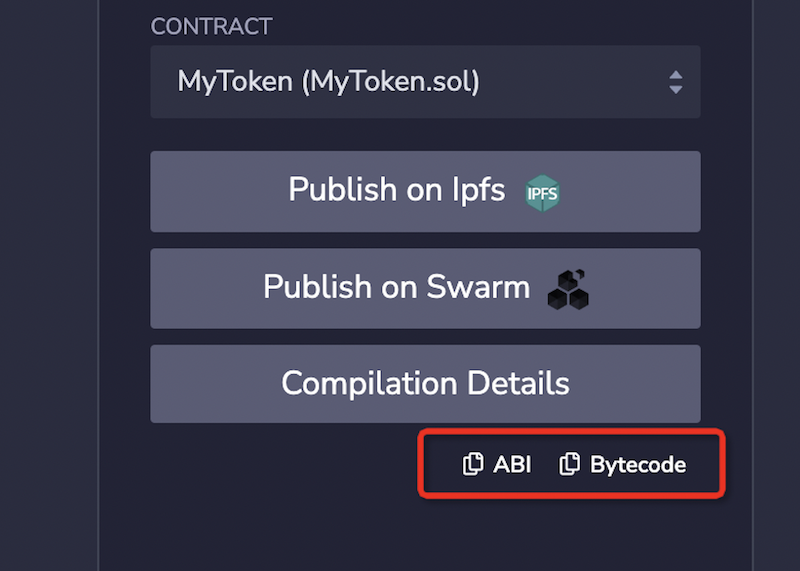
ABIis a JSON array that describes the contract interface.
Click ABI to copy and export:
Deploy
Click Deploy&Run to send the transaction to the current ENVIRONMENT. Deploying contracts consumes GAS, even on the test network. GAS is paid with ETH from the test network, so you also need to obtain some ETH from the test network through the faucet. For example, you can get Sepolia test network ETH through the ZAN test network faucet.
Next, we will try to deploy the contract to the Sepolia testnet through MetaMask. Please switch your MetaMask to the Sepolia testnet (of course, you can also switch to other testnets you are used to using).
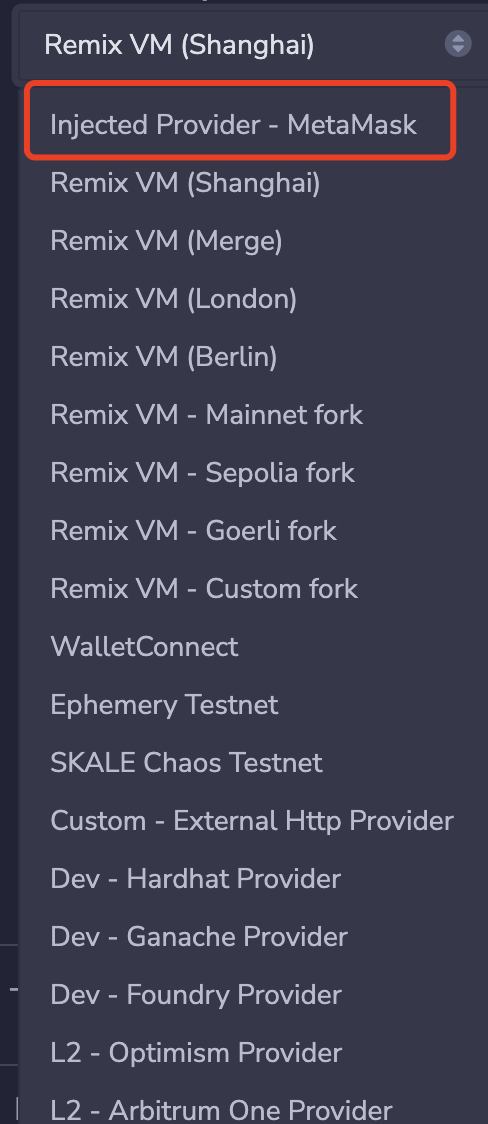
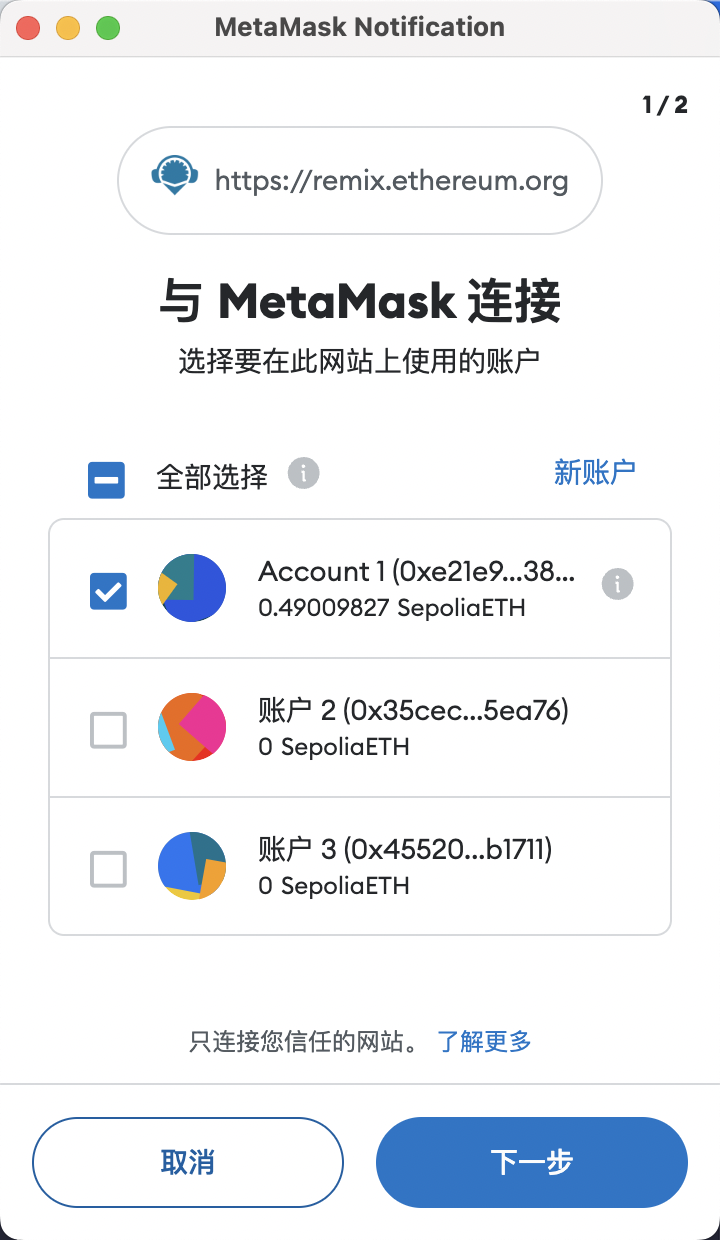
Click the drop-down box of ENVIRONMENT, you can see many options to choose from, we choose Injected Provider - MetaMask.
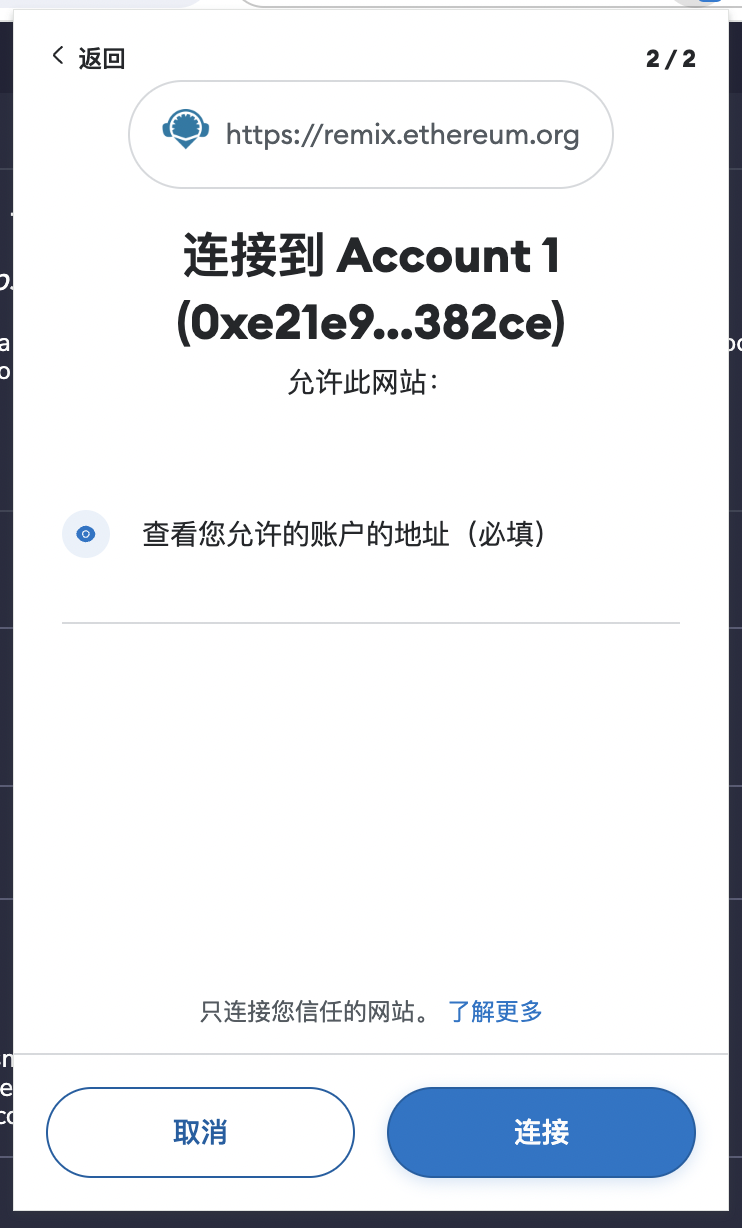
Then, MetaMask will pop up a window and prompt to connect it to Remix. After connecting MetaMask to Remix, the side panel will be updated to display the connected network and account. Deploying to the testnet also requires testnet tokens. You can find the corresponding testnet token faucet on the network for recharging.
Now, the wallet connection is complete, and you can start deploying the contract. Since a simple ERC721 smart contract is being deployed, the default Gas Limit set by Remix is 3 million, which is enough, and there is no need to specify the value sent with the deployment. For this, you can perform the following steps to deploy the contract:
- Make sure that
ENVIRONMENTis set toInjected Provider - MetaMask - Make sure the connected account is the account you want to deploy
- Use the default
GAS LIMIT: 3000000 - No need to adjust the set
VALUE: 0 - Make sure the selected contract is
MyToken.sol - Click
Deploy - Click
transactto send the deployment transaction MetaMaskwill pop up a window, click to confirm the deployment of the contract
![]()
After the transaction is deployed, you will see the details of the deployment transaction in the Remix terminal. In addition, the contract will appear below the Deployed Contracts section of the side panel. It is collapsed by default and can be expanded by clicking the small arrow.
![]()
You can try to expand it and then call mint, as shown in the figure below:
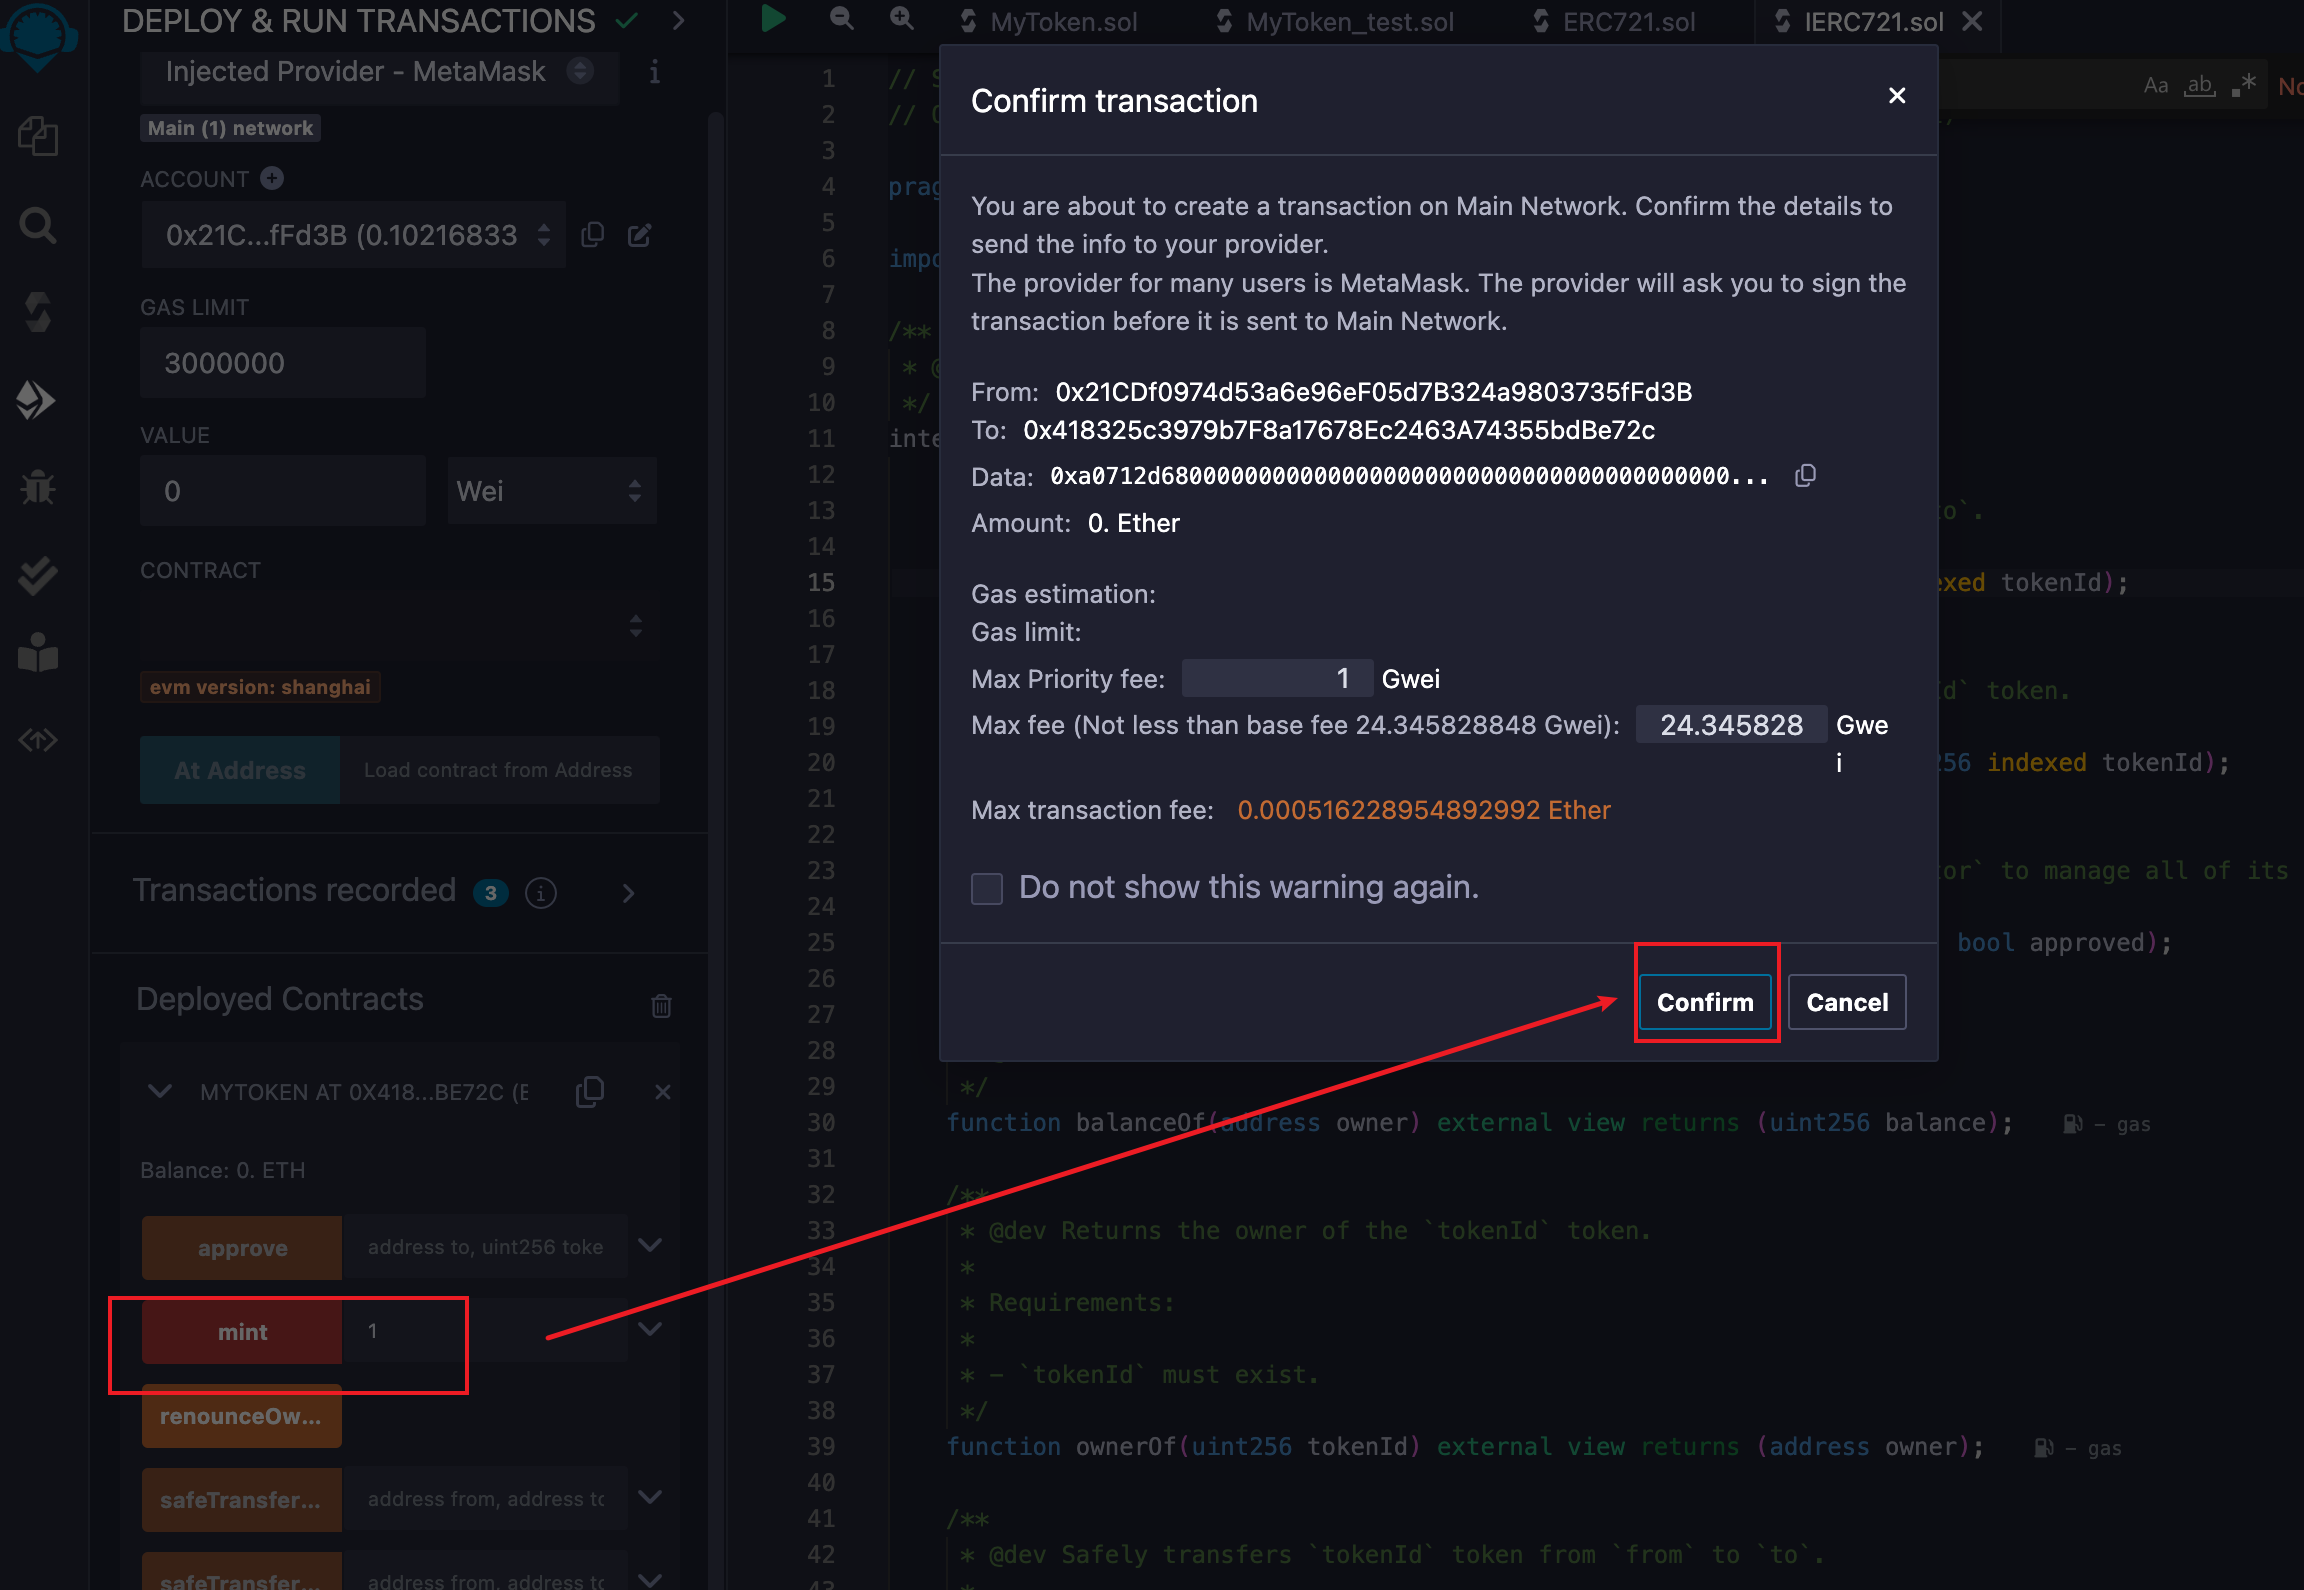
The call here will also trigger the MetaMask transaction confirmation pop-up window. After clicking confirm, you can initiate a transaction, which is the same as the process of initiating a transaction in DApp.
So far, we have successfully deployed a contract on the testnet. Next, we will try to call this contract in the DApp developed in the previous chapter.